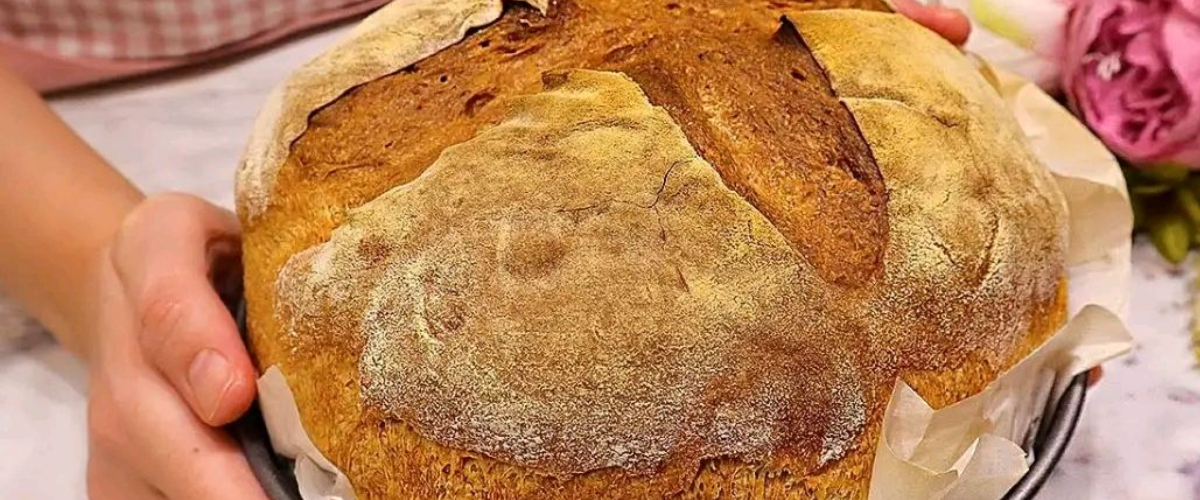
Ingrédients
- Eau tiède : 1¼ tasse (300 g) et plus si nécessaire
- Sel : 2 cuillères à café
- Levure sèche : 2 cuillères à café (7 g)
- Farine tout usage : 3 tasses (420 g) et plus pour saupoudrer
Instructions
Étape 1 : Préparez la pâte
- Mélanger les ingrédients : Dans un grand bol, mélanger l’eau tiède, le sel et la levure sèche. Remuer le mélange jusqu’à ce que la levure soit complètement dissoute.
- Ajoutez la farine : Ajoutez progressivement la farine dans le bol, en mélangeant avec une cuillère en bois ou vos mains jusqu’à ce qu’une pâte collante se forme. La pâte doit être légèrement collante mais maniable. Si elle semble trop sèche, ajoutez 2 à 3 cuillères à soupe d’eau supplémentaires pour obtenir la bonne consistance.
Étape 2 : Première montée et pliage
- Initial Rise: Cover the bowl with a clean kitchen towel and let the dough rise at room temperature for 1 hour. This initial rise allows the yeast to activate and the dough to begin developing its structure.
- Stretch and Fold: After the first 30 minutes, perform the first series of stretches and folds to strengthen the dough:
- Wet your hands to prevent sticking.
- Gently lift one side of the dough and fold it over itself.
- Rotate the bowl 90 degrees and repeat the stretch and fold on the opposite side.
- Continue this process two more times for a total of four stretches and folds.
- Repeat: Perform another round of stretching and folding at the end of the first hour.
Step 3: Second Rise and Coil Folds
- Second Rise: Let the dough continue to rise for another hour, during which you’ll perform two series of coil folds to further develop the dough’s structure and gluten:
- Coil Fold Technique: With wet hands, gently lift the dough from the middle, allowing it to fold under itself naturally. Place it back in the bowl carefully. Perform these coil folds twice, spaced 30 minutes apart.
Step 4: Shape and Preheat
- Shape the Dough: After the second rise, lightly dust a clean work surface with flour. Gently turn the dough out onto the floured surface and shape it into a round loaf by folding the edges towards the center. This helps create surface tension on the top of the dough, which is essential for a good rise and crust.
- Proof: Transfer the shaped dough to a floured proofing basket or bowl, seam side up. Cover the dough and let it rest while you preheat the oven.
- Preheat the Oven: Preheat your oven to 450°F (230°C). Place a Dutch oven or heavy pot with a lid inside the oven as it preheats. This will help create a steamy environment for the bread, essential for a crispy crust.
Step 5: Bake the Bread
- Transfer to Dutch Oven: Once the oven is fully heated, carefully remove the preheated Dutch oven. Gently place the dough inside, seam side down.
- Score the Dough: Use a sharp knife or a bread lame to score the top of the dough. This allows the bread to expand during baking, giving it an attractive appearance and preventing it from bursting in random places.
- Bake: Cover the Dutch oven with its lid and bake for 30 minutes. After 30 minutes, remove the lid to allow the crust to brown, and continue baking for an additional 10-15 minutes until the crust is golden brown and the bread sounds hollow when tapped on the bottom.
Step 6: Cool and Serve
- Cool the Bread: Remove the bread from the Dutch oven and let it cool on a wire rack for at least 20 minutes before slicing. This cooling period helps the interior of the bread set properly and prevents it from being gummy.
- Servir : Coupez et dégustez votre pain artisanal fait maison avec du beurre, de l’huile d’olive ou vos garnitures préférées. Il est parfait pour les sandwichs, les soupes ou en accompagnement de n’importe quel repas !
Conseils
- Hydratation : La quantité d’eau nécessaire peut varier en fonction du type de farine et de l’humidité de votre environnement. Ajustez en conséquence pour obtenir une pâte collante mais maniable.
- Conservation : Conserver le pain à température ambiante, enveloppé dans un torchon propre ou dans un sac en papier pour conserver la croûte. Pour une conservation plus longue, trancher le pain et le congeler dans un contenant ou un sac hermétique. Faire griller les tranches directement du congélateur au besoin.
- Variations de saveurs : Pour une touche d’originalité, ajoutez des herbes comme du romarin, du thym ou de la poudre d’ail à la pâte. Vous pouvez également y ajouter des graines, des noix ou des olives pour plus de saveur et de texture.
Informations nutritionnelles
- Portion : Donne environ 12 tranches
- Calories : 150 par tranche
- Protéine : 4 g
- Glucides : 28 g
- Matières grasses : 1 g
- Fibres : 1 g
- Sodium : 390 mg
Cette recette de pain artisanal est parfaite pour créer un pain magnifiquement croustillant et aéré, idéal pour toutes les occasions. Avec sa croûte dorée et son intérieur moelleux, ce pain deviendra rapidement un incontournable de votre répertoire de pâtisseries maison. Profitez du processus de fabrication de votre propre pain à partir de zéro et savourez le goût incroyable du pain artisanal frais fait maison !